Changing root certificate
Fluxzy uses a self-signed root certificate to intercept HTTPS traffic. This certificate is generated when the app is first launched and is stored in the user's home directory.
When you first start Fluxzy Desktop, it encourages you to generate a brand-new root certificate that is unique to your computer instead of reusing a shared embedded one. Because of that the default certificate is already set up and ready to use, and most users never need to change it - this page is for when you want to supply your own certificate instead.
The root certificate is used to sign the certificates of the intercepted hosts. This means that the root certificate must be trusted by the client in order to avoid SSL errors.
To update the default root certificate used by fluxzy, you can go to the settings dialog (Menu Settings > Proxy Settings) and, in the section Root certificate, change the root certificate with the following choice:
- Use the self-signed root certificate
- Use a certificate on the current user store
- Use a certificate from a PKCS#12 file and a passphrase
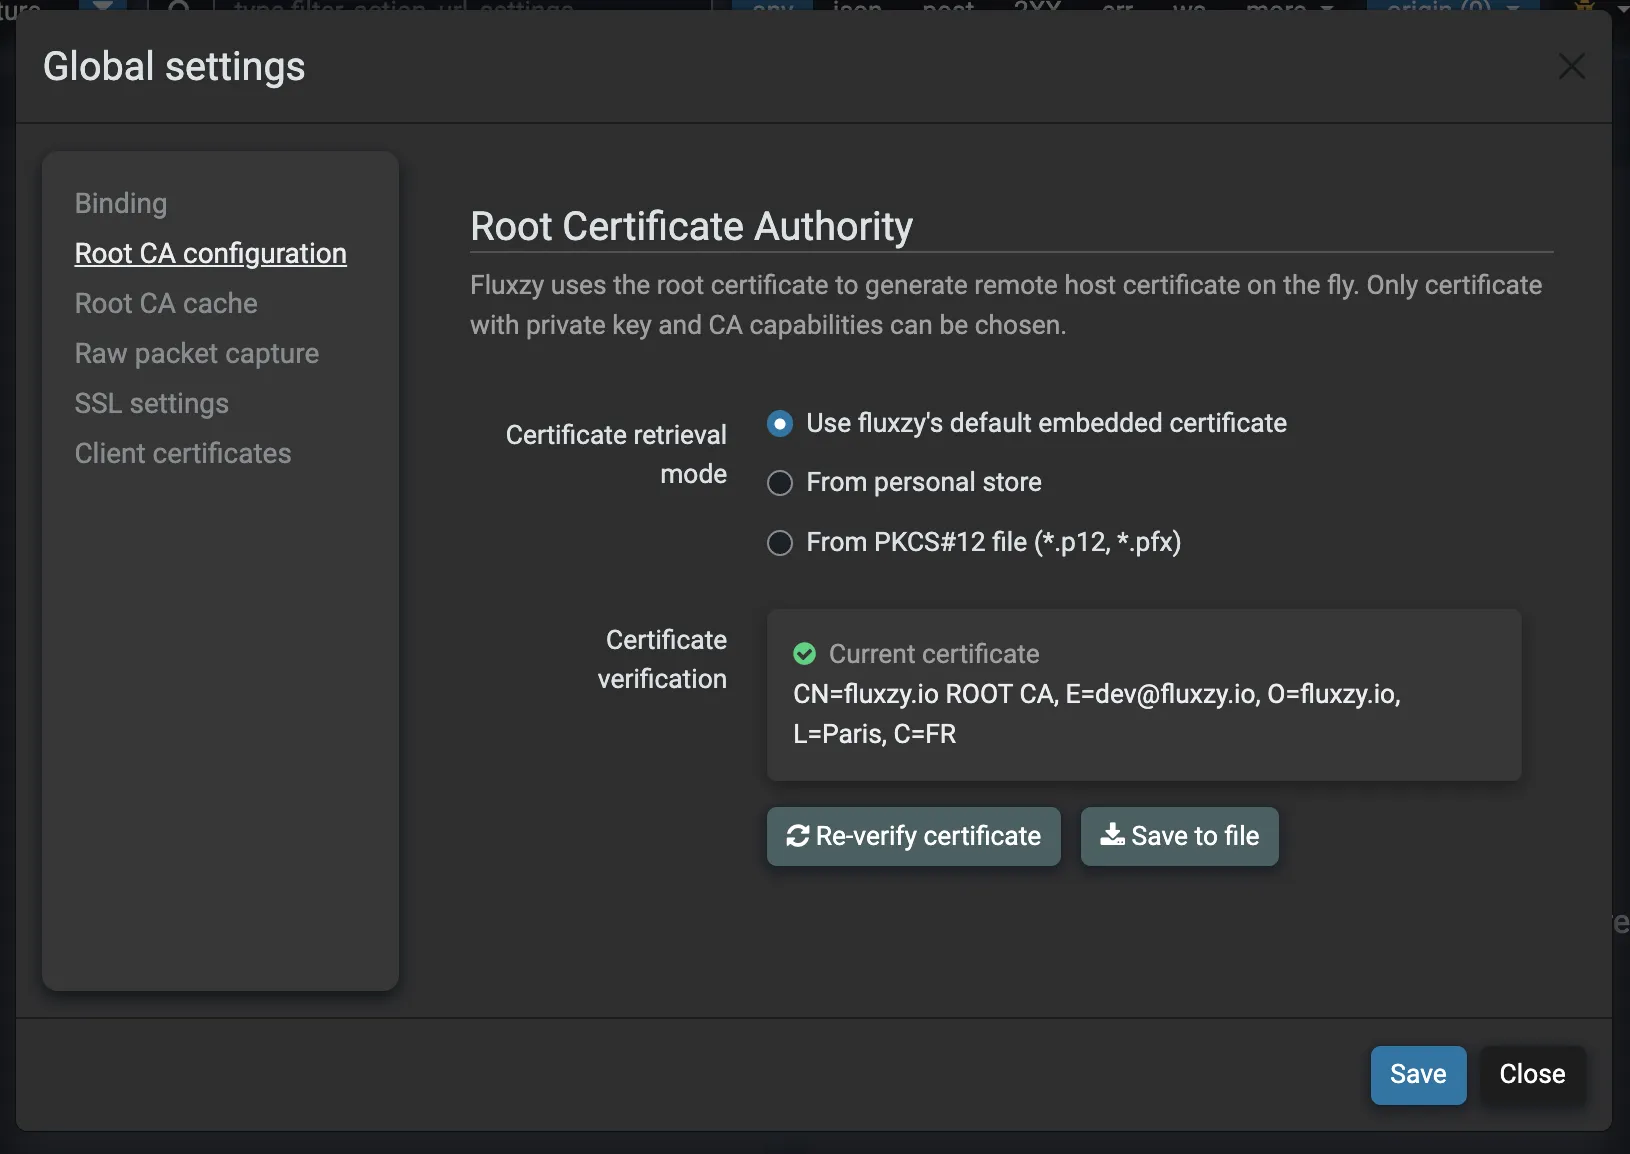
Once the certificate is change, a check will be automatically performed to ensure that fluxzy can access to the private key.
Click on Save to apply the changes.
If you want to supply your own certificate instead of Fluxzy's generated one, generate it with the correct x509v3 extensions, key size and signature algorithm - an MITM root CA has different requirements from a normal web-server certificate, and getting them wrong makes clients reject it or stops Fluxzy from signing leaf certificates. See How to create a self-signed certificate for MITM proxying for a correct setup, then load the resulting .p12 / .pfx with the PKCS#12 file option above.
Certificate installation wizard
When fluxzy detects that the root certificate is not trusted by the current OS, it will prompt a wizard to install the root certificate. You can use the wizard to install the root certificate on the OS (an elevation is needed) or dismiss the wizard indefinitely.
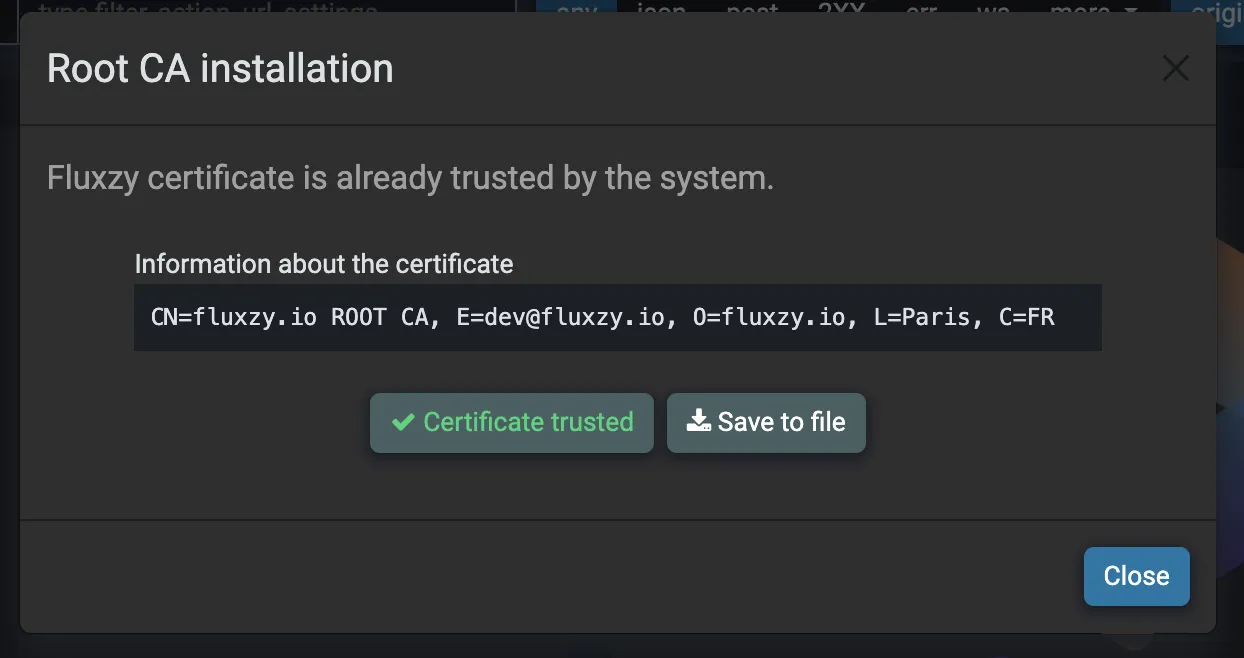
You still can recall the wizard later on menu Setting > Run certificate wizard.
Manage the root certificate from the command line
The Fluxzy CLI manages root certificates too, which is handy for scripting, headless machines or CI. The essentials:
# Create a new self-signed root CA in PKCS#12 format
# (see the blog above for the correct extensions and key settings)
fluxzy cert create MyCustomCa.p12 "My Root CA"

# Set it as the default root CA for every Fluxzy app (CLI, Core and Desktop)
fluxzy cert default MyCustomCa.p12

# Trust a root certificate in the OS store (elevation required; use sudo on macOS/Linux)
fluxzy cert install my-root-ca.cer
If the PKCS#12 file is password protected, set the FLUXZY_ROOT_CERTIFICATE_PASSWORD environment variable before running cert default.
To trust the certificate with native OS tooling instead (certutil, security, update-ca-certificates / update-ca-trust), follow Alternative: trust the certificate from the command line. The full command set (export, check, list, uninstall, …) is documented under fluxzy cert.